Black powder revolvers are incredibly fun to use at the range but often come with their share of mechanical problems that must be addressed before you can safely use them at the range. From my experience, the manufacturers tend to get the revolvers about 90-95% of the way to completion but always seem to drop the ball on one issue or another before they ship it out. One of those problems is the cylinder being out of time when you pull the hammer back.
I know, you just paid between $350 and $600 and you have the audacity to expect to have a revolver that is fully functional and polished right from the manufacturer, right? Welcome to the sport of cap and ball revolvers where you’ll likely be doing a lot of amateur gunsmithing to get your new revolver up and running!
Let’s touch on what “timing” is on a revolver, how to test if your revolver has an issue, and how to go about fixing it. We’ll keep this brief, include some pics to help you out, and link to a video as well where I guide you through the process.
And just in case you’re new to the sport, the terms “cap and ball”, “percussion”, and “black powder” all are synonyms when it comes to our discussion about these revolvers.
What Is Cylinder “Timing” on a Cap and Ball Revolver?
The timing on a cap and ball revolver is how well the cylinder lines up with the barrel and locks into place after you’ve pulled the hammer back. In order to function properly, one of the six (or 5, depending on your model) individual chambers within the cylinder must line up perfectly with the forcing cone on the barrel assembly. The bolt must also spring up and lock into the cutouts along the side of the cylinder to lock it in place and keep it from spinning if you were to try to move it manually.
A cylinder that is not timed perfectly will likely not even fire as the hammer cannot fall onto a cap of the cones in the cylinder.
If the cylinder always locks into place and the chamber to be discharged is perfectly in line with the forcing cone, then your revolver is perfectly timed.
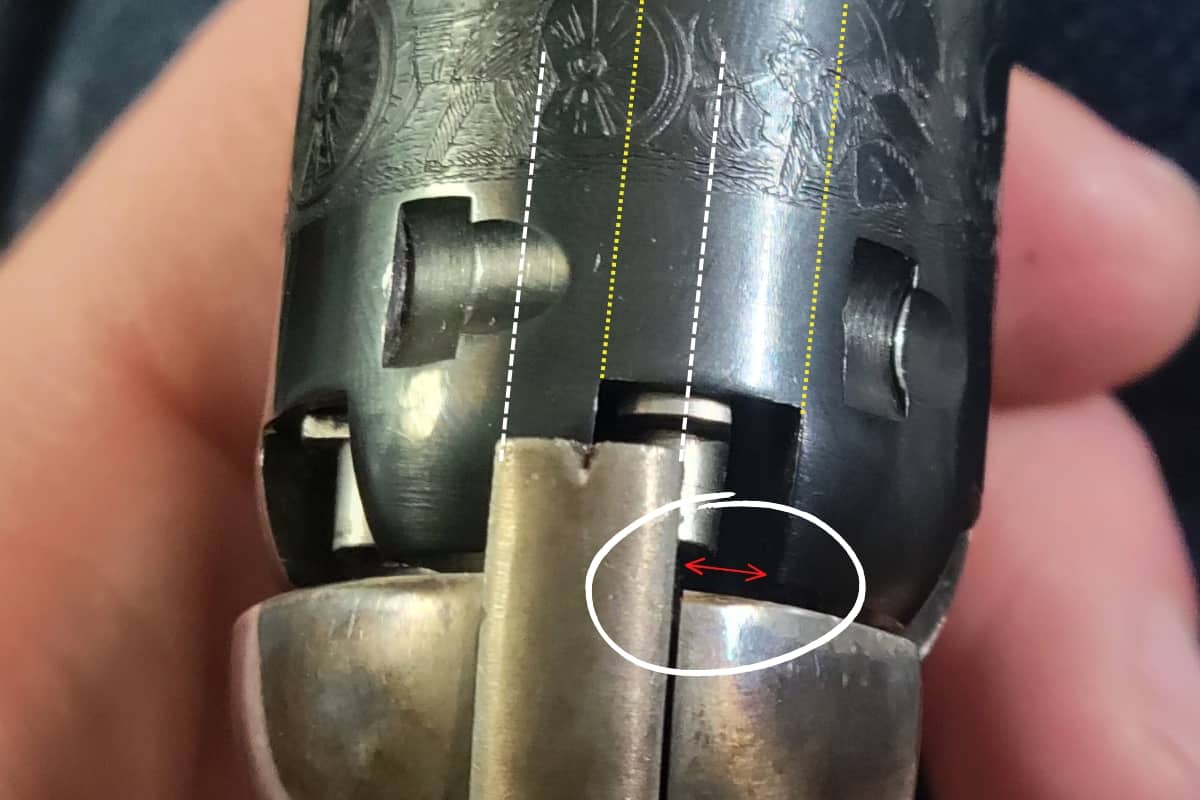
If you pull the hammer back and need to help the cylinder finish its rotation in order to lock into place, then your revolver is under-traveling (see image below).

If you pull the hammer back and need to rotate the cylinder backwards in order to lock it into place, then your revolver is over-traveling (see image below).
How to Tell If Your Percussion Revolver Has a Timing Issue?
The easiest way to tell if you have this problem is to pull the hammer back 12 times very slowly and take note of the cylinder position at the end of each of those pulls. Try to rotate the cylinder by hand at the end of each of the pulls and listen for a click to indicate that it was not locked into place. Take note of what direction you twist when you hear the click. Ideally, you shouldn’t hear any click or feel any play in the cylinder after the hammer is fully pulled back.
Then, pull the hammer back 12 times very fast and do the exact same thing as above. Often times, you’ll have a revolver that performs just fine during a slow or normal hammer pull, but when you pull it back quickly you’ll experience over-travel if the tolerances are off by even a little.
Remember, if you have to twist the cylinder back to the left, then you’re experiencing over-travel (most common). If you’re having to twist it to the right to complete the rotation, then you’re experiencing under-travel (less common).
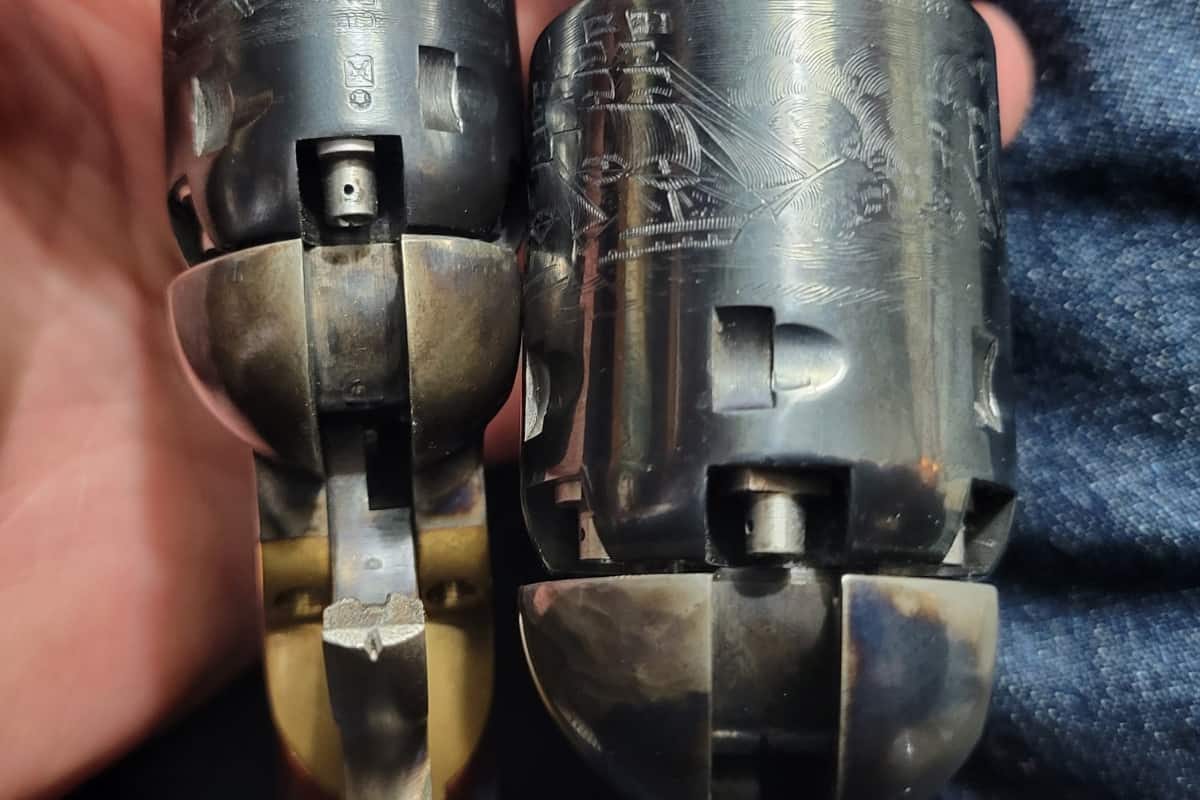
Another indicator that you have a timing issue without even pulling the hammer back is to look at the side of the cylinder around the cutouts for the bolt. If you see dings or grinding in the bluing, then your bolt is likely popping up when it shouldn’t and marring up your finish.
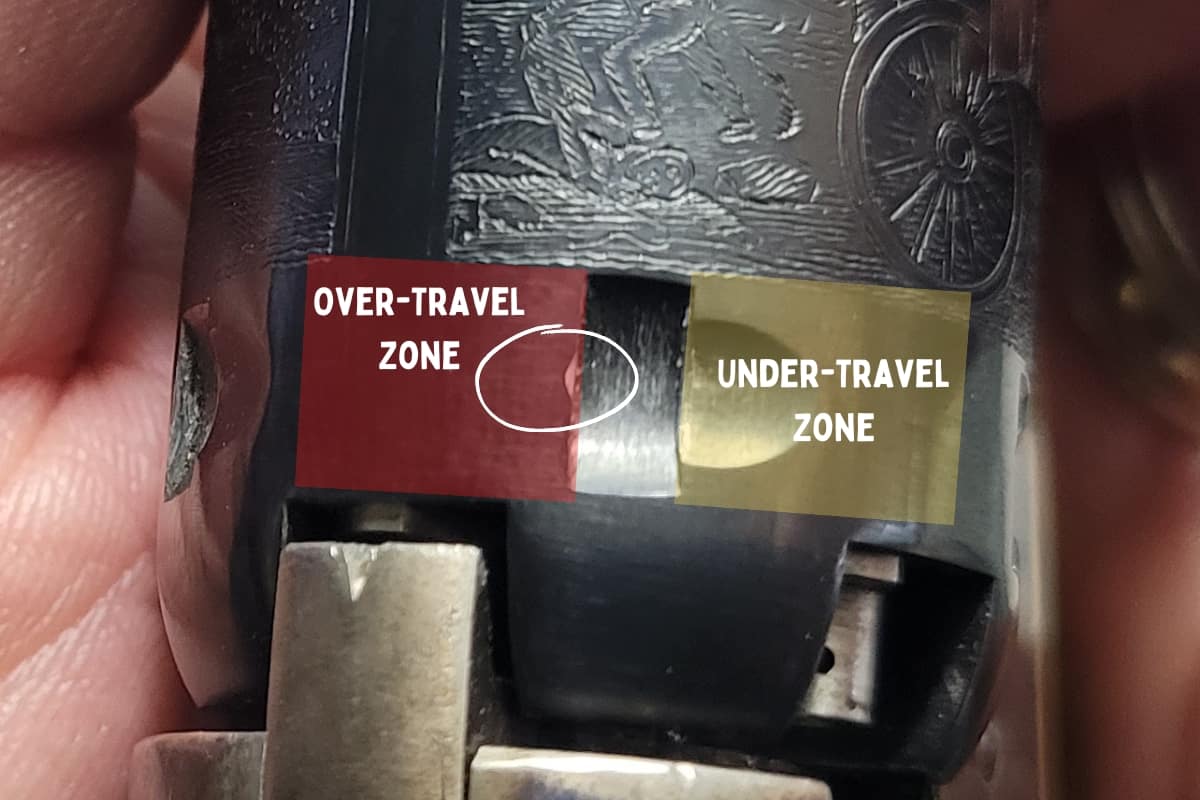
Any blemishes to the ramped portion (or side) of the cutout indicates under-travel. Any blemishes on the opposite side of the ramp or even on the edge of the cutout itself is an indicator of over-travel (see image below).
How to Fix the Timing on a Black Powder Revolver
If you’re experiencing under-travel, which is far less common, the best thing to do will be to buy a new cylinder bolt stop for your particular make and model. If you have a Pietta, make sure you order a Pietta part. If you have a Uberti, order a Uberti part. The new one may or may not solve the problem immediately. If you continue to experience problems, hopefully it’ll be in the form of over-travel because you can fix over-travel by removing some metal, but you can’t put metal back on to fix under-travel.
Now, if you’re experiencing cylinder over-travel, you are going to need to address the cylinder bolt stop.
On the cylinder bolt stop, there is the blocky part that is piece (bolt) that gets pushed up and locks into the cutouts on the side of the cylinder to lock it into place. There are also two “fingers” on the cylinder bolt stop which are there to ensure that the bolt depresses and pops up exactly when it should so that your cylinder timing is perfect every time.
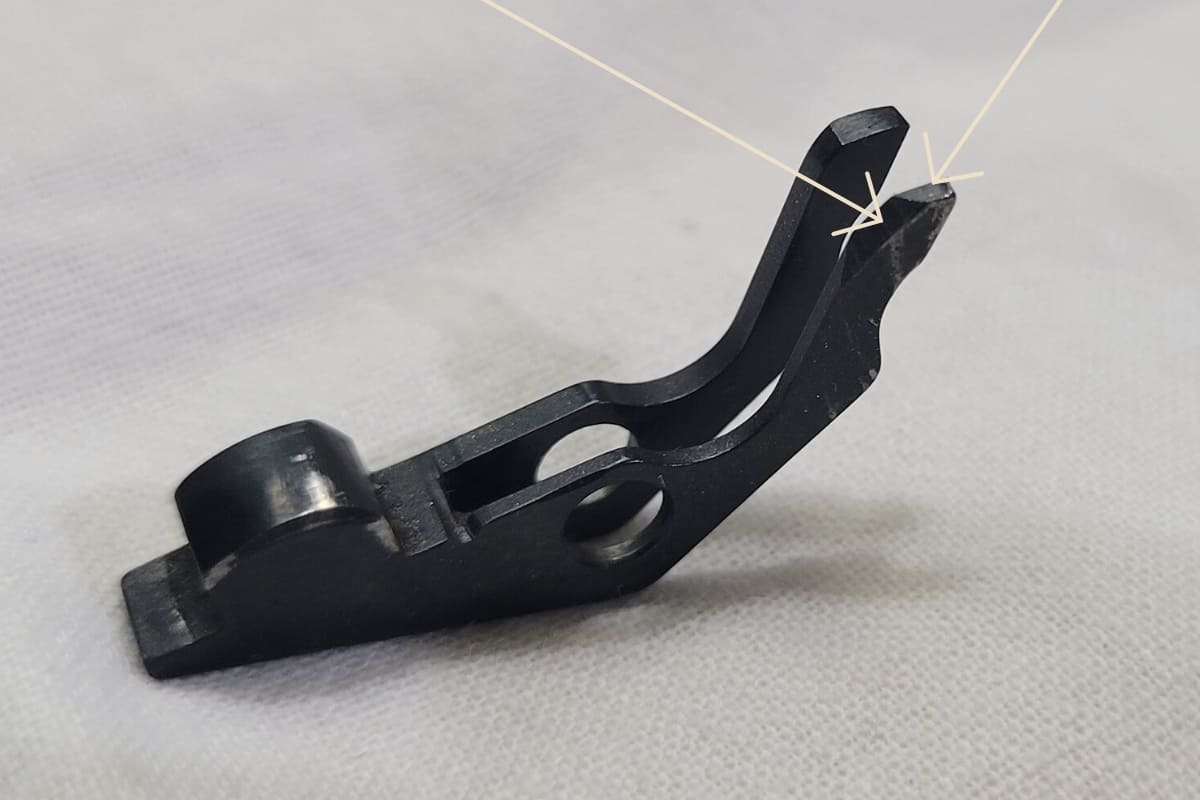
One of these fingers rides alongside a cam on the base of the hammer. The finger that presses against and rides that cam will slip off it at the last moment (when the hammer is fully pulled back) and when it does the bolt should spring up and lock perfectly into the cylinder. Remember that as you’re pulling the hammer back (especially quickly), the cylinder has momentum and is really only stopped because of a perfectly timed bolt that catches it at the exact correct time.
In order to fix over-travel, first take note of exactly how much it’s over-traveling. Take a photo with your phone for reference.
Next, you’ll need to disassemble the revolver so that you can access the cylinder bolt stop. Note the position it is in when it is in the revolver in order to carefully note which finger presses up against the hammer. This is the only finger you’ll be altering. If you get confused later, it’s the thinner and more flexible finger of the two.
Take careful note of all of the angles of that finger, as it is carefully designed to ride along the hammer’s cam at certain angles and in a certain way. Everything is mostly 90-degree oriented, but when you look carefully you’ll see a 45-degree area.
You’ll now need to take fine grit sandpaper and use some spray adhesive to attach it to a flat block. A 2″x2″ block is all you’ll need. You can use that same spray adhesive to put emery cloth on the reverse side if you’d like to ensure the best finish possible.
Now, carefully take that cylinder bolt stop and do 5-10 light strokes on the sandpaper for each of the two angles of that finger. You’re looking to remove just a little bit of metal at a time. Remember, you can always remove more but you can’t add it back!
When you’ve touched up all of the angles, go ahead and reassemble your revolver and retest. Take note of how much that over-travel has diminished. In my case, I had to disassemble and reassemble about 8 times until I got it right. It was tedious, but worth it.
The more metal you remove, the more the over-travel will be reduced. If you remove too much, then you’ll start experiencing under-travel and you’ll need to buy a new cylinder bolt stop and start over. You need to be very careful and exact when doing this task!
When you think you’ve fixed the problem, I recommend pulling the hammer back quickly 100 times and checking the cylinder each time for proper lockup and alignment. By using a fast hammer pull, you will expose any errors that might be covered up by a slow hammer pull.
If you get a perfect 100/100, then your problem is solved.
On my 7th attempt, I did 200 hammer pulls and got over-travel twice (just enough to where it needed me to barely even touch the cylinder for it to lock into place). I disassembled once again and only did 2 very light passes on the sandpaper and I’ve never had it over-travel since — no matter how quickly I pull the hammer back.