
My first experience with black powder revolvers was with the primary competitor of Uberti and I experiences a lot of negative issues with it. I chalked it up to “you get what you pay for” since it was definitely a cheaper brand. On my next purchase, I decided to spend the extra money and get a Uberti cap and ball pistol.
I eagerly awaited its arrival and had high hopes that it would be a solidly built revolver right out of the box, with no gunsmithing needed and a great fit and finish…
I couldn’t have been any further from the truth. In fact, I even bought another Uberti for a different model and I also experienced lots of problems.
If you’re also interested in hearing about what you might expect from a Pietta revolver, I have an article here where I share my experience with that brand as well.
I am not affiliated with Uberti in any way and this article is just to highlight my experiences with Uberti cap and ball revolvers. There have been a lot of negatives, and a lot of positives. In the end, I love my Uberti revolvers and think you will love them too if you’re in the market for a black powder revolver.
Cylinder Gap
When searching the black powder forums of the internet, I found that I am definitely not alone when it comes to having a Uberti with an obnoxious cylinder gap.
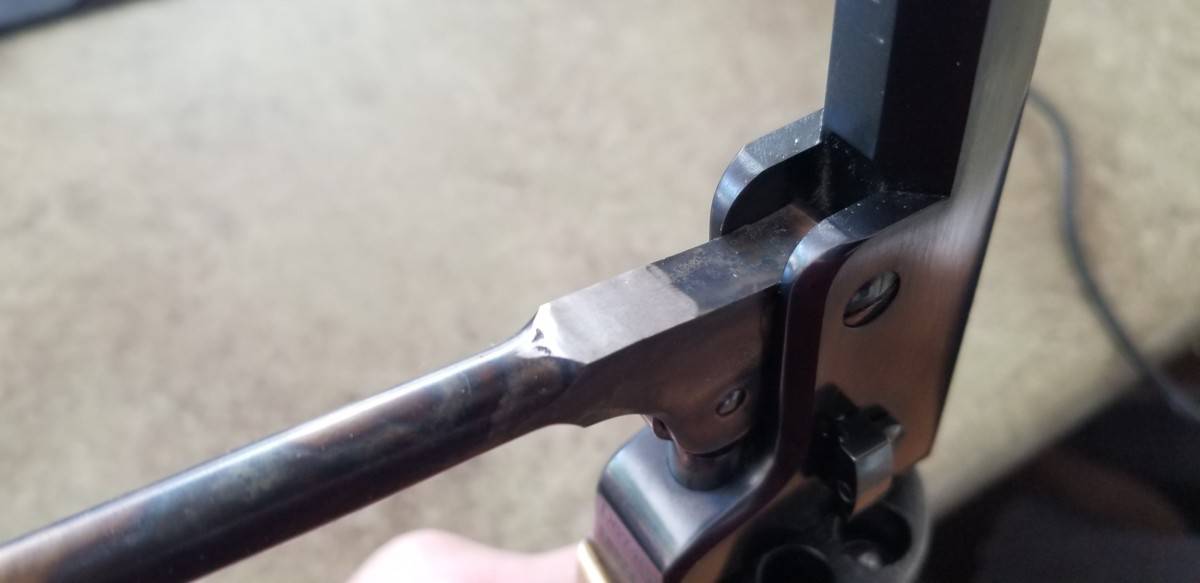
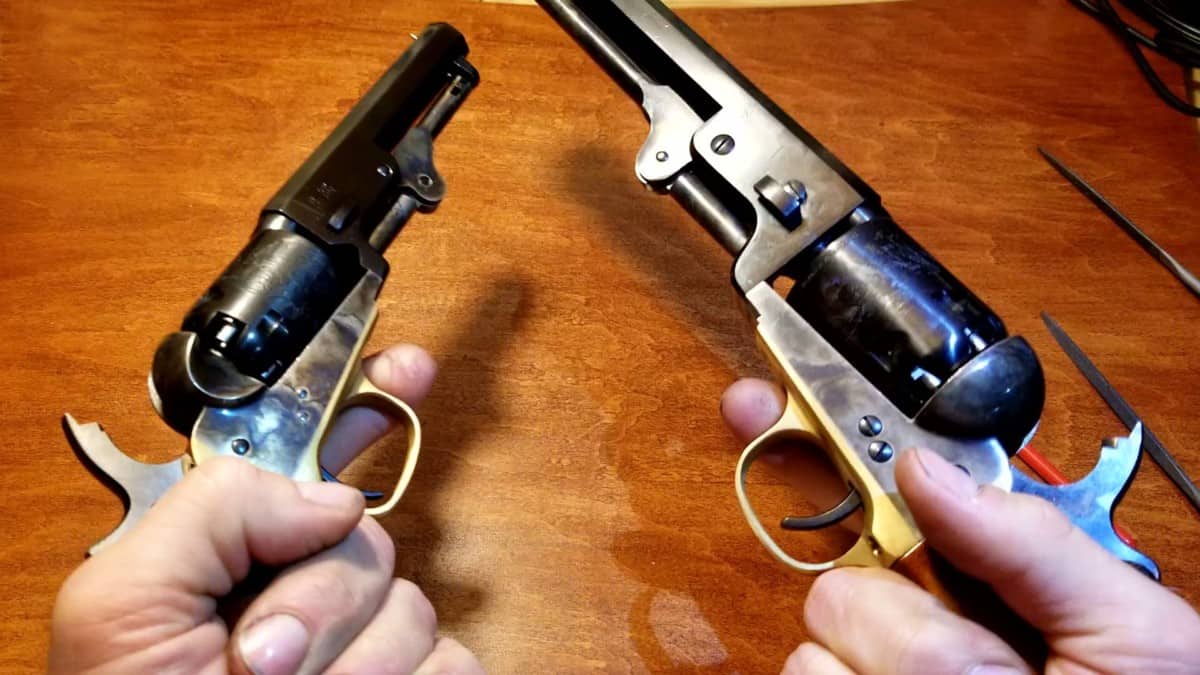
If you’re new to revolvers, the cylinder gap (or end shake) is the distance between the front end of the cylinder and the forcing cone of the barrel assembly. See the picture below.
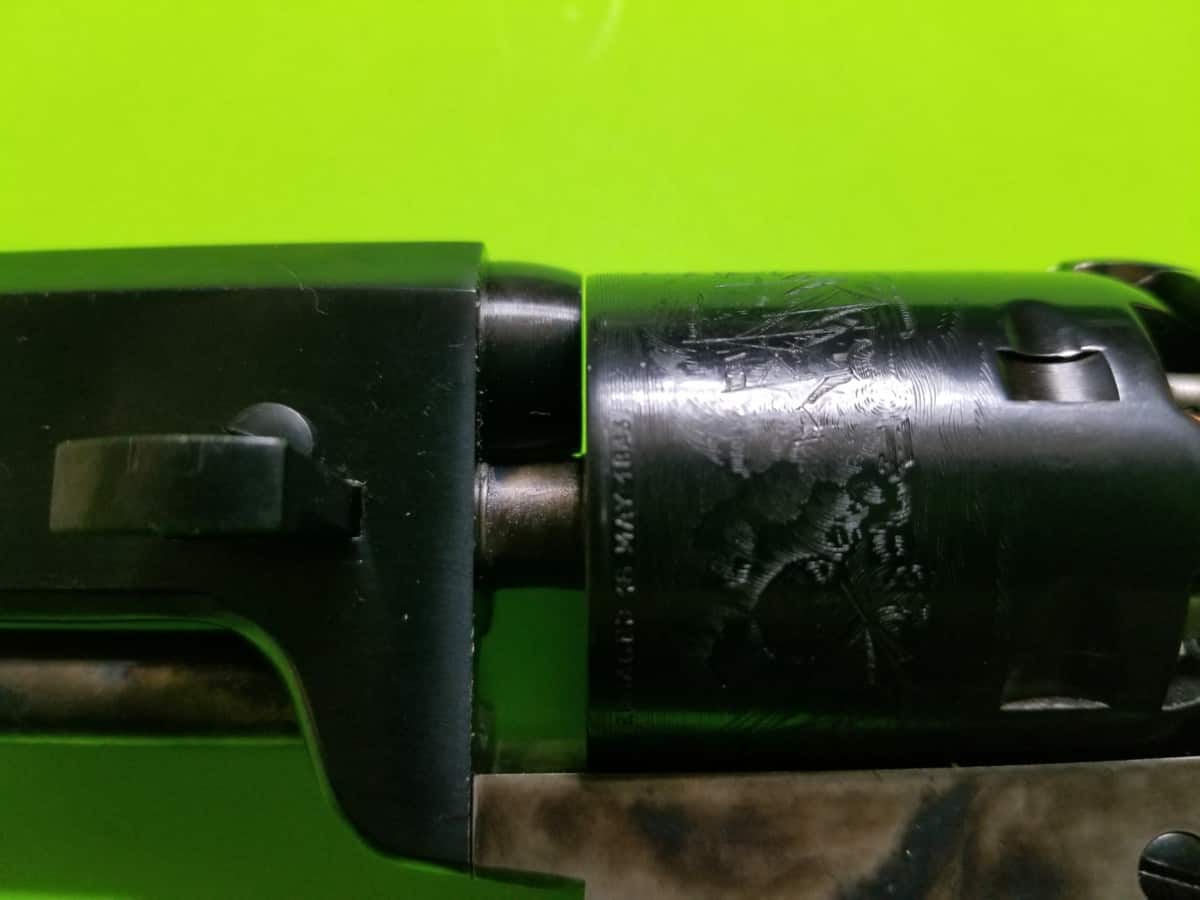
Ideally, you don’t what to see daylight when you look at the cylinder from a profile picture like in the photo above. Having a lot of play between the two locations allows for burning powder to escape and flare out of that area when you pull the trigger.
This leads to a loss of velocity and unnecessary fouling on your revolver at the range. I also believe that increases the chance of a chainfire (where other chambers in the cylinder combust on their own) due to the flare of the flame.
With the hammer down and in the relaxed position, the hammer is actually pushing against the cone (nipple) and putting pressure on the cylinder to move forward against the forcing cone.
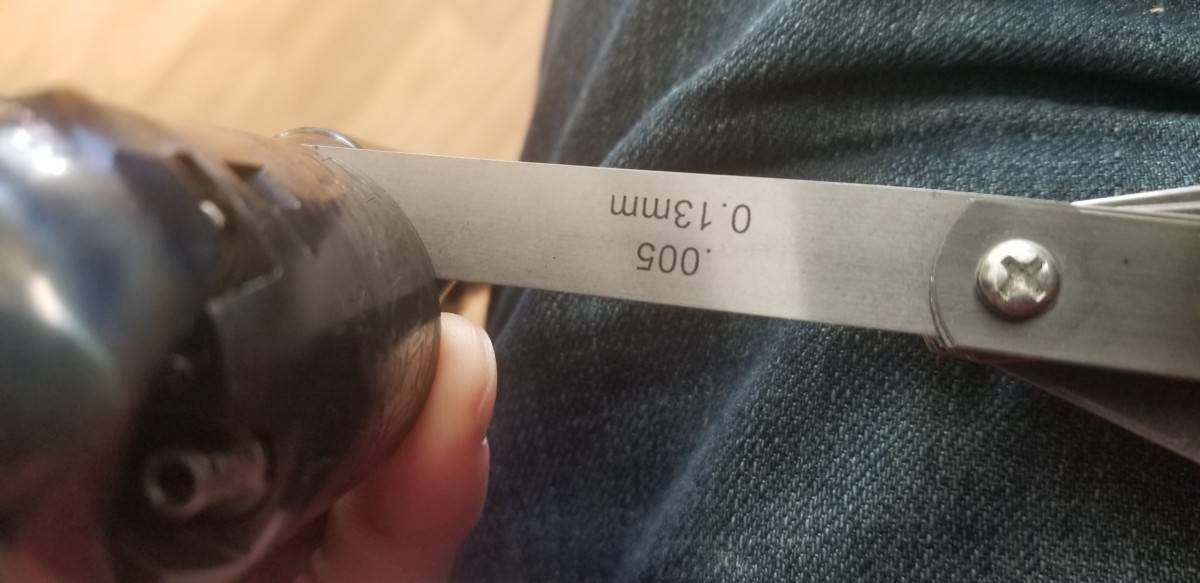
The only way you should see daylight is if you physically pull the cylinder back towards the hammer (with the hammer retracted) and that daylight should not exceed 0.004″-0.006″ when using a feeler gauge. My Pietta came from the factory at 0.005″. I don’t remember what my Uberti was but it was horrendous. After fixing it, it’s now at 0.0025″ and functions great.
If you are experiencing an excessive cylinder gap, check out my article here on how I fixed it on my Uberti.
On my first Uberti, I found that I could see lots of daylight regardless of whether the hammer was down or pulled back.
When I pulled the cylinder back towards the hammer, the daylight became egregious and seemed unacceptable given the higher cost of the Uberti versus its primary competitor. The competitor got this issue perfect in every model I’ve ever held or fired.
I don’t remember the measurement, but even an amateur would have noticed how sloppily matched the barrel assembly and the frame were.
To make things worse, the barrel and frame are even number matched at the factory! Whoever inspects these needs an update on their lens prescription or they need to hold each revolver up to the light when assembled.
When all was said and done, and after hours of research to find an acceptable solution, I did end up fixing the cylinder gap on my Uberti 1851 Navy. To be fair, I also purchased an 1849 Pocket Pistol and the cylinder gap on it was perfect out of the box.
Timing
The timing on my Uberti 1851 Navy was perfect out of the box, but was TERRIBLE on my 1849 Pocket Pistol.
Pulling the hammer back quickly resulted in the cylinder over-travelling by a full quarter inch and pulling it back slowly was just fine. In order to fire, I would have to turn the cylinder backwards 1/4″ in order to have it fire.
To be honest, with quality like that, I felt like I got the HiPoint of the black powder models.
Pro Tip: To check the timing on a cap and ball revolver, you must perform two tests. First, pull the hammer back very slowly. Listen for the clicks (3 on replicas) and watch where the cone (nipple) rests in relation to the hammer slot on the final click. It should be locked in place (won’t move at all when you try to turn it by hand in either direction) and it should be in line with the hammer slot. Then, pull the hammer back very fast as if you were in a wild west shootout. Check again to see that the cylinder is lined up properly and locked in place. If it isn’t in either situation, then you have a timing issue.
This required lots of careful and tedious disassembly, the lightly sanding down of the arm of the bolt that rides against the cam of the hammer, reassembly, and repeat about 12 times until you’ve sanded off just enough of the metal from the bolt to make it engage the cylinder at the proper time.
Sand off too much metal and then you’ve got to order a new bolt, replace it, and perform the same process until the timing is right.
I’m talking a couple hours of work to do it right — exactly what you want to have to do with a brand new firearm, right?
This should have been done at the factory, and there’s really no excuse for it.
I’m a firm believer at this point that Uberti and Pietta ship all of their guns at 85% of their potential. They all require gunsmithing to get them to function as they ideally should, and that’s a shame.
Ease of Disassembly
Whether you’ve got to do some basic gunsmithing right after purchasing your Uberti, you’re curious about how the internals work, or you need to clean it after shooting — you’re going to have to fully disassemble the handgun at some point.
Prepare yourself for at least 20 minutes of tediously filing the infamous “Uberti Step”, as coined by Mike Bellevue on the Duelist1954 youtube channel.
Both of my Ubertis could be taken apart easy enough, but trying to put them back together — even when you know exactly how to do it — is a pain in the a$$.
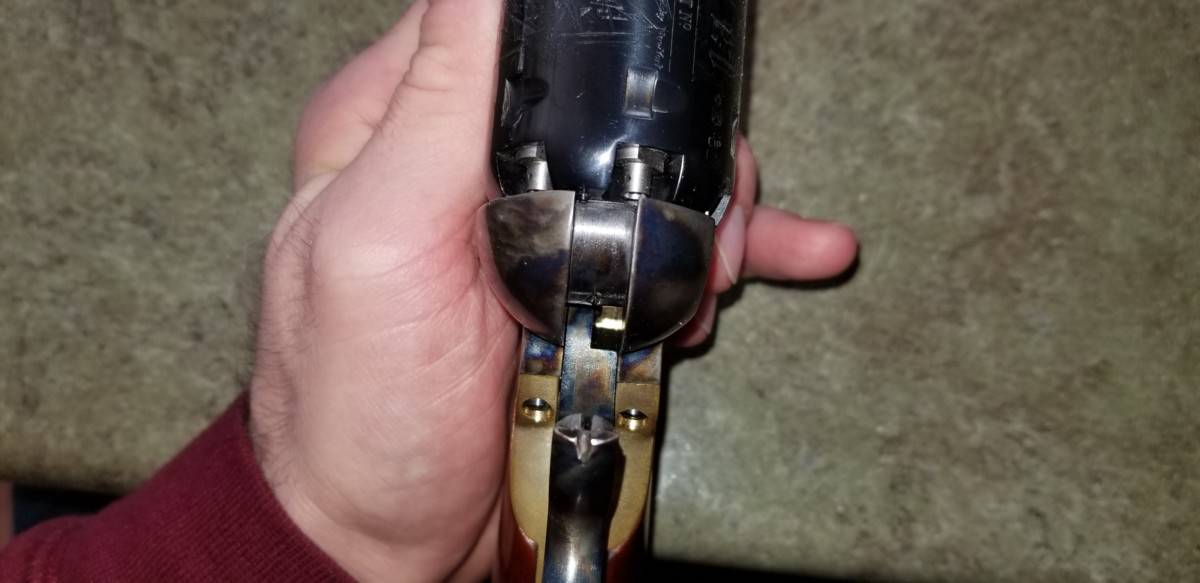
Alongside the hammer is the hand which turns the cylinder. The hand and hammer must be inserted at the same time and the hand slides through a rectangular channel in the frame.
Inside of that channel is a manufacturing flaw and there’s a metal lip from when they cast the frame. This lip will stop the hammer and hand in their tracks and there’s really no way to get it back together unless you just luck into it. Even then, good luck repeating the process.
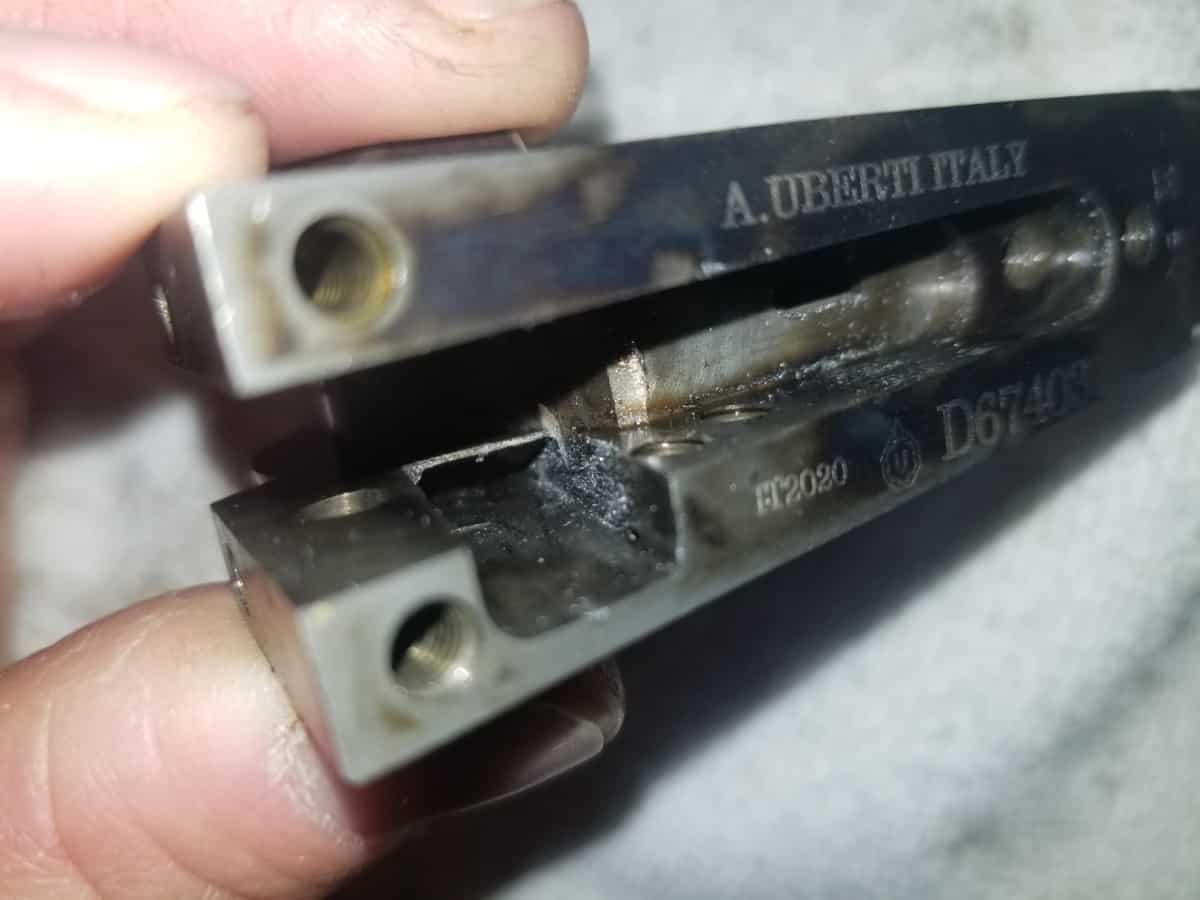
You must take a small rectangular file and tediously make that metal lip as flush with the frame as you can. You’re not going to remove it, but when you file it down enough it will eventually allow the hand to slide by again.
If I recall correctly, my Pietta also has this lip but it was much less pronounced and wasn’t a problem. Both of my Ubertis could NOT be reassembled until I filed out this channel in the frame.
Loading Lever Issues
Both of my Uberti revolvers had issues with the loading lever.
My 1851 Navy revolver had a hump on the loading lever that sat on top of the lever when the lever was in the closed position. This hump was near the pivot point and when you’d go to close the lever, the hump would make contact with the bottom of the barrel when you were still about 1/4″ from getting it closed.
So, in order to close the loading lever back in its stored position, you’d have to really squeeze the lever so that it would engage in the retainer piece.
This put the loading lever under spring tension and it wanted to spring out of place and fall down at the slightest bump.
The pressure was so much that it actually removed bluing from the bottom of the barrel where the hump would make contact.
I ended up having to grind a lot of metal off with a Dremel in order to get it to not touch the barrel. This ruined the color case hardening finish on the loading lever as well where I had to use the Dremel.
My 1849 Pocket Pistol’s loading lever had a problem with the retainer itself. The groove was cut so shallow on the retainer that it required little pressure whatsoever to push it down without meaning to do so.
For this, I ended up having to tape the barrel to protect it and then use a triangle file to cut into the retainer piece so that the spring mechanism on the loading lever had something to actually engage and stay in place when not in use.
Weak Metal (Screws)
This is a problem with Uberti and Pietta both, so I can’t just bash Uberti about it.
All of the screws that you will have to engage with will gnarl up badly if your screwdriver slips.
Be sure to use gunsmithing screwdrivers or bits, and be careful. It’s really the softest of metal that is used for these screws.
I had one of the internal screws cross threaded by accident. I barely put any force on it before I realized it was cross threaded and when I backed it out the threads on the screw were already crushed and I had to go to my local Big Box home improvement store and sift through all of their small metric screws to find a few replacement options.
When I did, I still had to grind the head of the new screw down so that it would not stand proud of the frame so that I could put the trigger guard back on.
I have read plenty of forum comments that Uberti uses softer steels for their firearms than Pietta. I cannot confirm this, but I thought it was something worth pointing out if you wanted to do your own research on it.
Fit and Finish
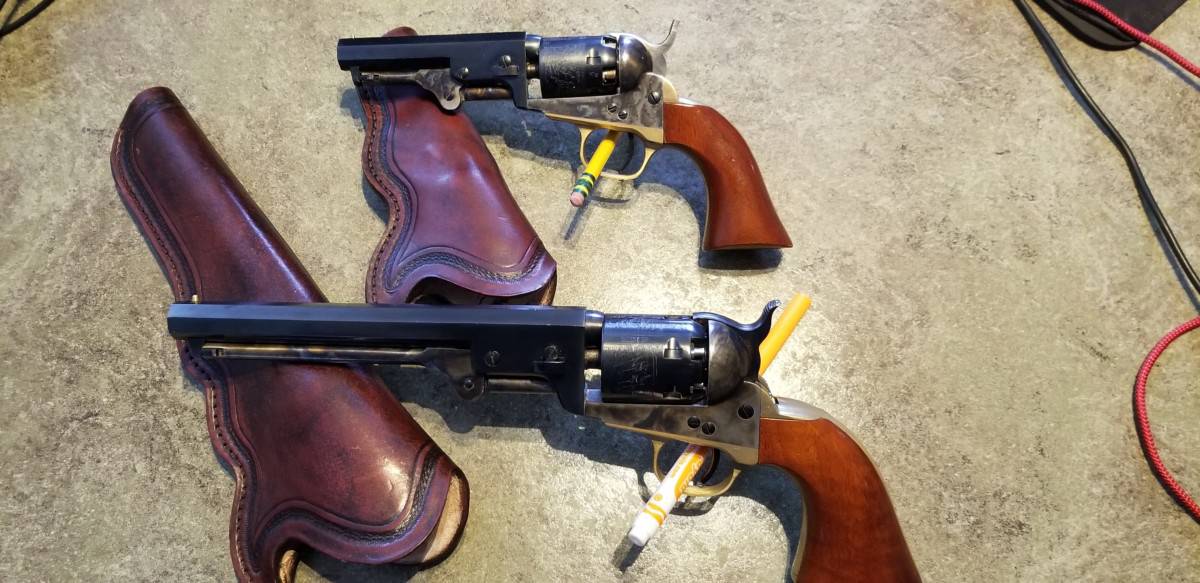
When it comes to the fit and finish, that’s where I tend to fall in love with Uberti over their competitor.
To me, the Uberti models are just aesthetically more pleasing to look at and are a fine little work of art.
Again though, they both companies ship their products at 85% of their full potential.
I had issues with the loading lever and the cylinder gap, yes, but once corrected the Uberti became beautiful.
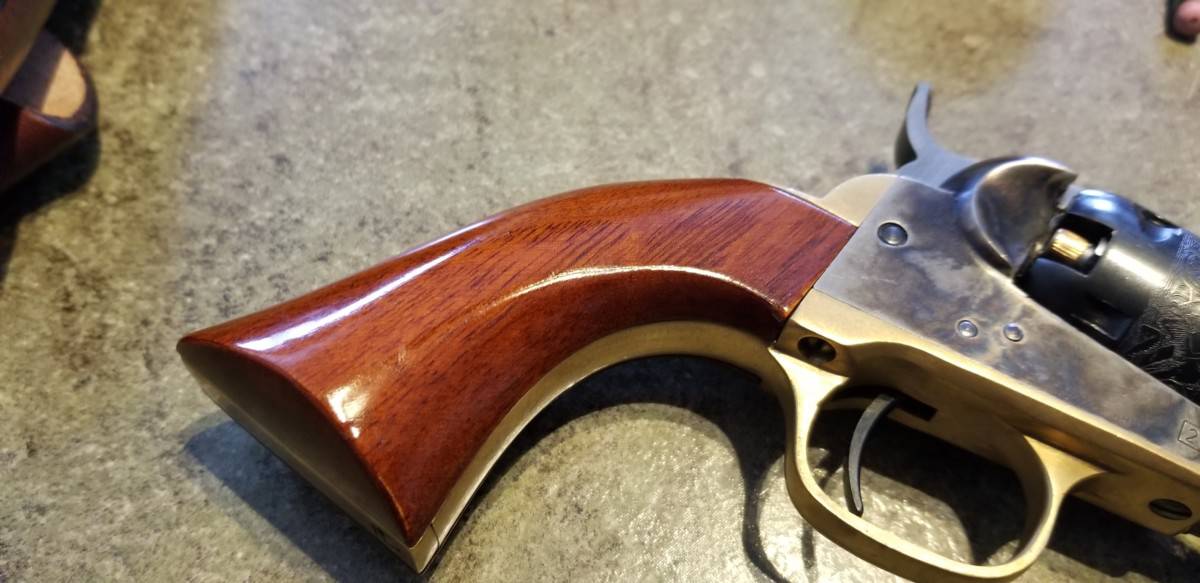
The wooden grip is fantastic with a semi-gloss finish and depth to the grain of the wood that is striking.
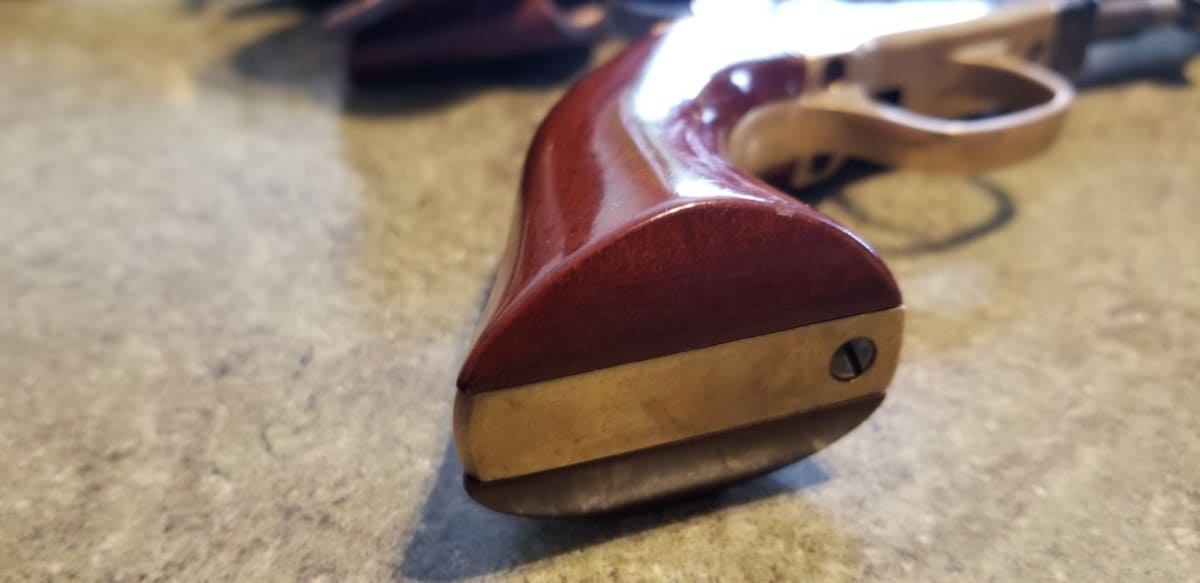
The wooden grip mates perfectly with the metal back-strap as well. There is no overhang, everything is flush, and nothing stands proud. It’s a pleasure to hold in my hand.
The color case finishing is nice (I still think Pietta does it better) and the bluing is great as well.
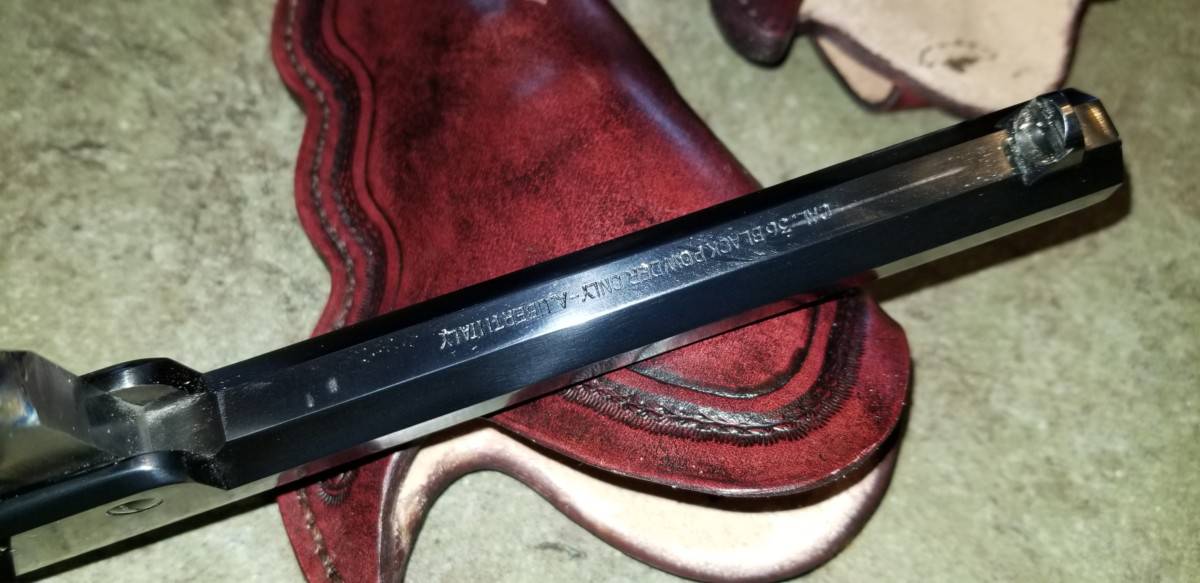
Better yet, Uberti has the common sense to put their manufacturing markings under the barrel so that they’re hidden by the loading lever! These do not look like fancy cap guns from when you were a kid like Pietta!
Sometimes qualities are intangible and can’t be described logically. There’s just something about holding a Uberti versus holding a Pietta. My Uberti shoots great and I love putting her in a display case when not in use. It’s kind of like having a sports car and a car that’s strictly for driving to work so you don’t put miles on your nice one.
My Pietta is like my work car. Just as reliable now that it’s been tuned up, but there’s no real pride in it.
Crown
Thankfully Uberti gets this step right, unlike their competitor Pietta. Uberti takes the time to actually crown the muzzle.
If you’re new to firearms, a crown on a muzzle is when you round off the edges of the inside of the barrel. This protects the rifling from damage if you happen to drop it.
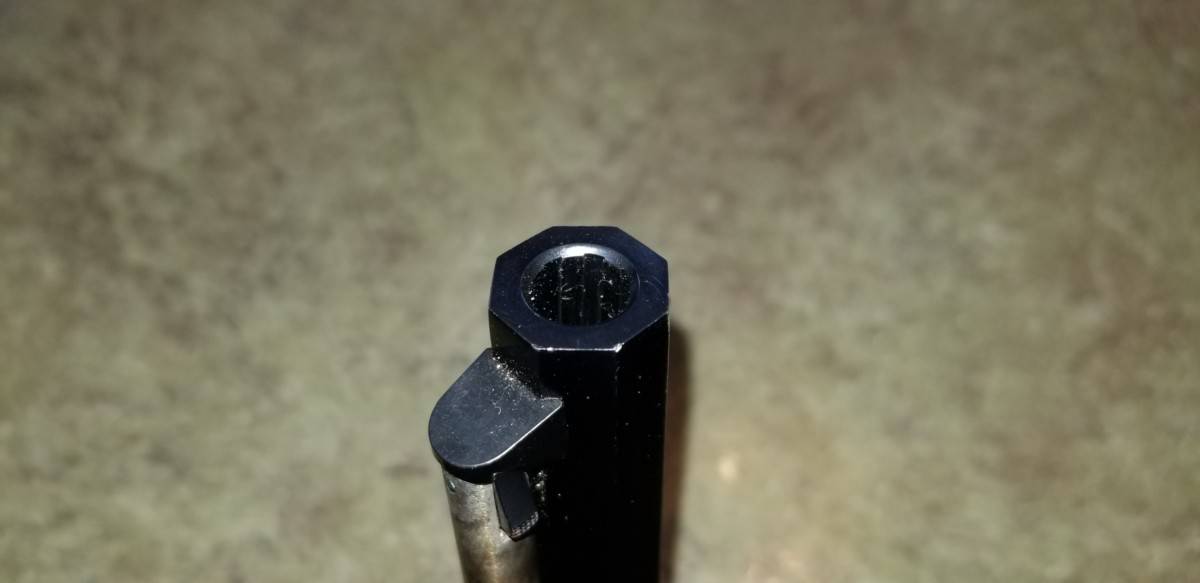
If you didn’t round off the edges, then the muzzle (where the bullet exits) would have a sharp 90-degree angle. Any knick with a hard object would cause that 90-degree to fold inwards slightly.
With a little burr of metal from the 90-degree now overhanging the muzzle, every bullet that passes by that burr will have its flight path affected. Accuracy may not suffer at close ranges, but as you move back you’ll certainly see a difference.
Hammer
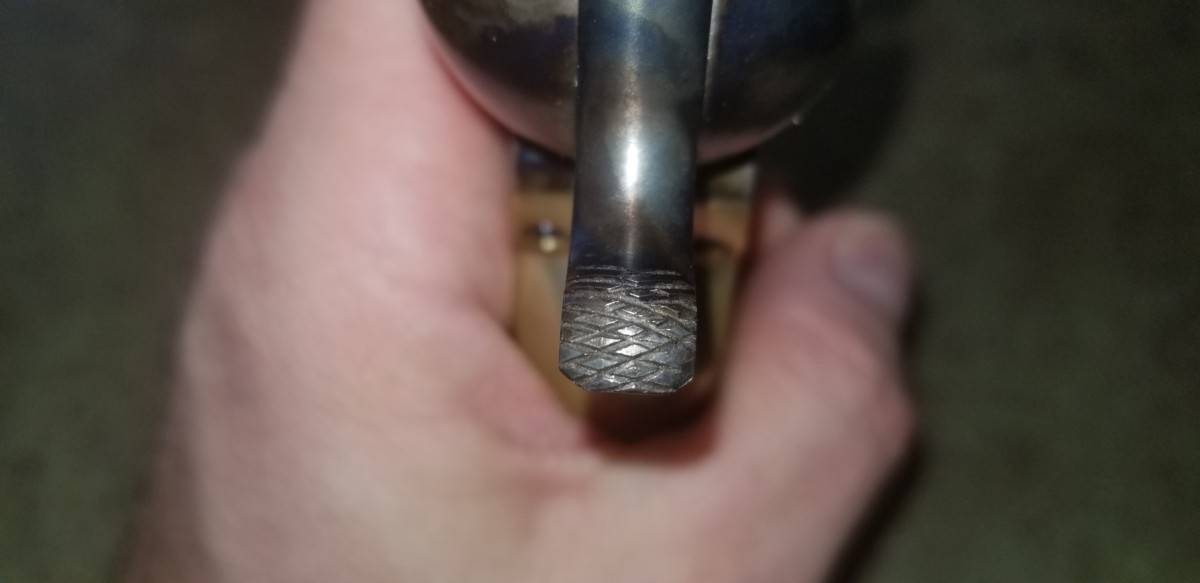
Another area where Uberti got things right is with the top of the hammer where you pull it down with your thumb. They put some serious etching into the metal in a criss-cross pattern that is rough enough to strike a match on.
There is no mistaking that you have solid contact with that hammer and there is no doubt in your mind that your thumb will NOT slip off of it.
Compared to Pietta (see article here), which leaves much to be desired, the trigger on the Uberti is awesome.
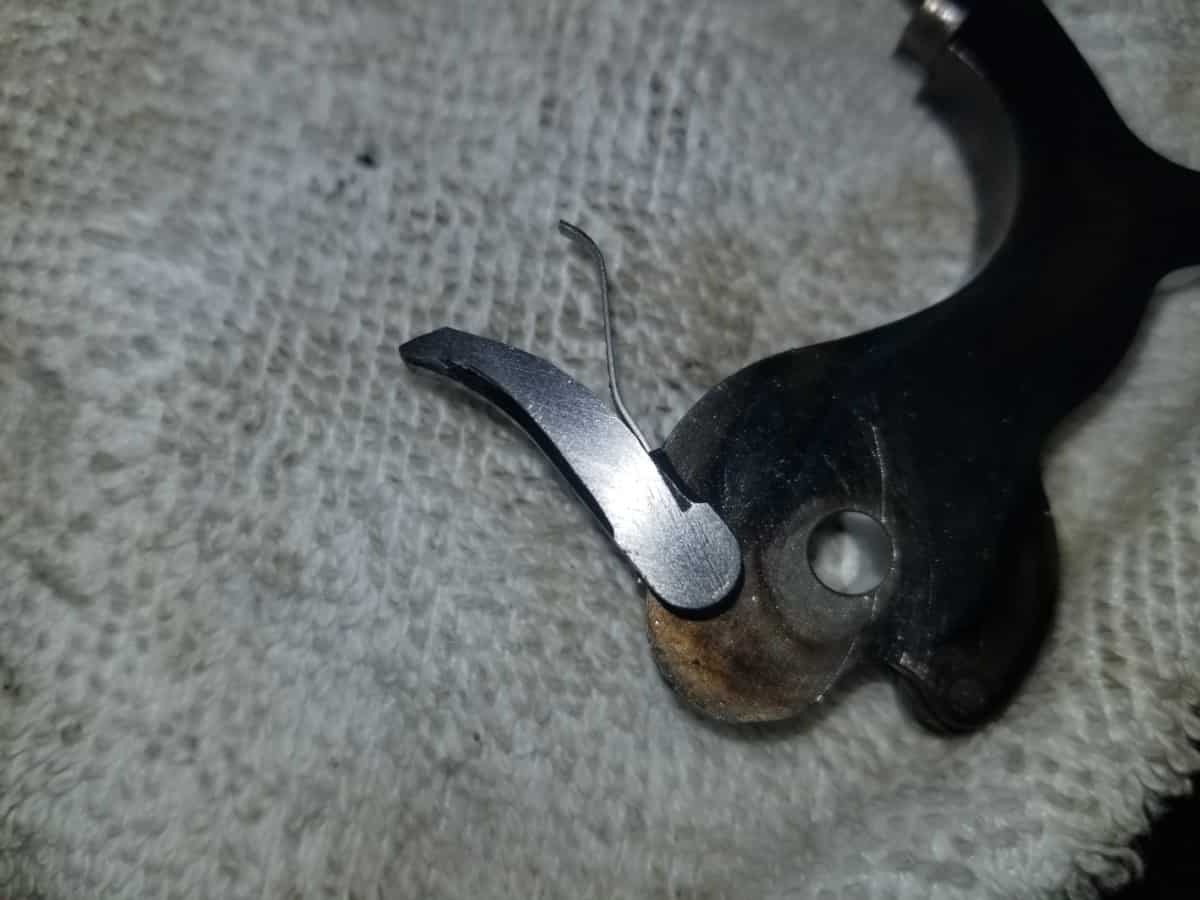
The fit and finish issue I had with my Uberti 1851 is that the notch that is cut into the hammer face so that it can rest on one of the safety pins (that sit between the cones) was crudely cut out and jagged metal was hanging off of that and needed to be filed down for a bit. Again, just another sloppy quality control job that seems to be common with Uberti.
Price (for the amount of gunsmithing you have to do)
Overall, where Uberti fails the most in my eyes is the amount of post purchase gunsmithing that must be done in order to make the firearms safe (cylinder gap) and functional (timing).
With the research that I had to do to fix these out-of-the-box problems, and then to tediously complete the process, I just cannot recommend a Uberti for a first time black powder revolver enthusiast — unless you’re handy and competent in some basic gunsmithing skills.
The issues that I had with my Uberti are unacceptable for a $400 firearm and they really need to get their quality control under wraps.
Reliability and Accuracy
Once I replaced the trigger-bolt spring with a spring for Wolff Gunsprings, swapped out the factory cones for the stainless steel SliXshot brand, and fixed the timing/cylinder gap — my Ubertis have been utterly reliable.
Cap jams seem to be a complete non issue once the new SliXshot nipples are installed.
I have never had a round fail to fire with any of my Uberti’s and I’ve probably put 100+ rounds in with my 1851 Navy and about 2 dozen shots with my newer 1849 Pocket Pistol.
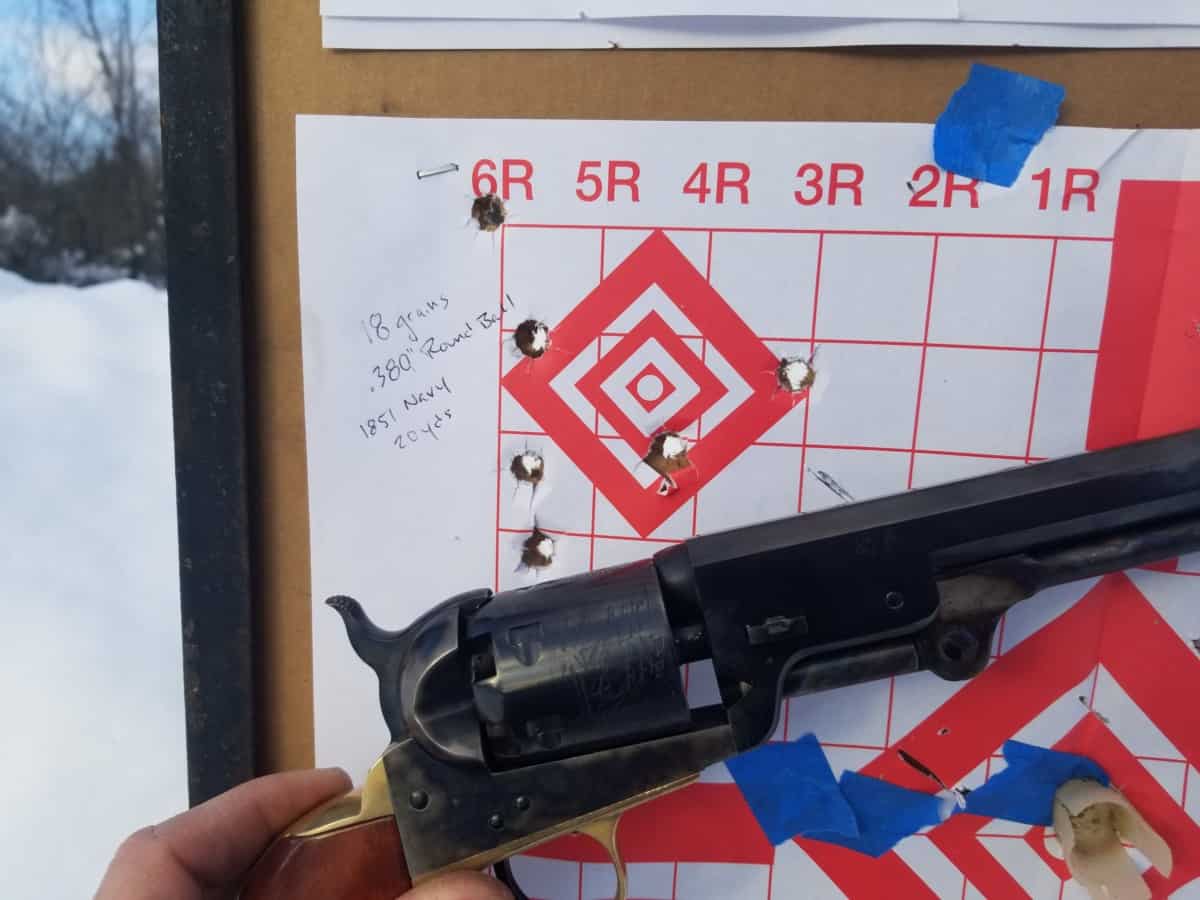
I shoot my Uberti a little better than my Pietta — especially at the 20 yard mark — but that’s likely just due to the longer barrel and better balance in the hand. My Pietta is a Sheriff’s model with a shortened barrel.
My Load: I have a .36 caliber 1851 Navy that uses SliXshot nipples, #10 Remington caps, a 0.380″ lead round ball, and 20 grains of FFFg Goex black powder. My .31 caliber 1849 Pocket Pistol uses SliXshot nipples, Remington #10 caps, a 0.323″ lead round ball, and 12 grains of FFFFg Goex black powder.
Why You Should Buy a Uberti
A Uberti is just a sexy firearm in my opinion and just stands above the competition in looks and the way it feels in your hand.
They definitely come with their issues, however, as we’ve already discussed.
If you’re willing to take the time to slick up the action, replace the hammer and bolt spring with a spring from Wolff Gunsprings, fix the timing and cylinder gap (if either is present), then you’re going to be left with a beautiful gun that is worthy of any display case.
If you’re looking for a firearm that will require some TLC but one that will also turn into an absolute gem by the end of it — then a Uberti is right for you.
If you’re looking for a black powder revolver that requires minimal gunsmithing skills (just the replacement of the cheap trigger-bolt spring), that isn’t necessarily a “looker”, and that functions reliably, then you can’t go wrong with a Pietta.
Pietta gets a lot of things right, and a lot of things wrong. The same can be said of Uberti. Going forward, I will purchase only Ubertis because I have the confidence in my skills at fixing up the actions of these replicas and I value the aesthetics that Uberti brings.
If I were not as inclined to perform these fixes and do all of the troubleshooting, then I would definitely stick with Pietta. They do seem to have better quality control but a less appealing look to their products.